|
|
 |
|
Follow the instructions listed below to create a least 5 fossils. Use
the small objects that you have brought from home to create your individualized casts
Materials
Modeling clay about the size of a large walnut
Egg carton
5 small, detailed objects (shell, twig, crystal,
toy)
Petroleum jelly, such as Vaseline
7 ounce paper cup
Plastic spoon
Plaster of Paris (available from craft
store or hardware store)
Tap water
Procedure
Place 4 spoonfuls of dry plaster of Paris in each cup.
Squeeze the clay until it is pliable.
Place a flat disk of clay in at least five of the egg carton openings.
Coat one side of the object with petroleum jelly.
Press the lubricated side of the shell into the clay.
Carefully remove the shell from the clay.
Observe the imprint of the shell in the clay. Re-do if imprint is not clear
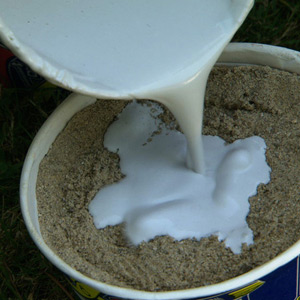
Place two spoonfuls of water in each cup and stir until smooth.
Pour the plaster mixture into the shell imprint in the clay. Note: Throw the cup and spoon away and do not
wash any plaster down the sink as it can clog the drain.
Allow the plaster to harden to harden overnight.
Remove plaster from clay and observe your cast fossil. Initial the back of your fossils and set them out for other student
scientists to observe.
|
|
|
Lab - Day 2
Observe the fossil samples around the classroom, both student
made and teacher provided. Record at least 3 factual observations about each fossil and make a hypothesis about how
or what "formed" that particular fossil. Record all observations on a Word document. Be sure to save it to your
desktop as "Fossil Observations."
|
|
|
|
|
Enter supporting content here
|
|
|
|